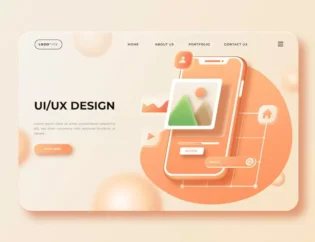
Web Application
In spite of free web-builders, building a high-end website is not easy. Often code is thought to be the core of website development. But that is not really the case. Web design is equally important.
Often a website is the face of your brand. Before interacting directly, often people go and look at the business/brand website. In this case, the website should tell everything about your brand and be user-friendly whenever someone visits it. Hence web development becomes a crucial part of website building and brand building.
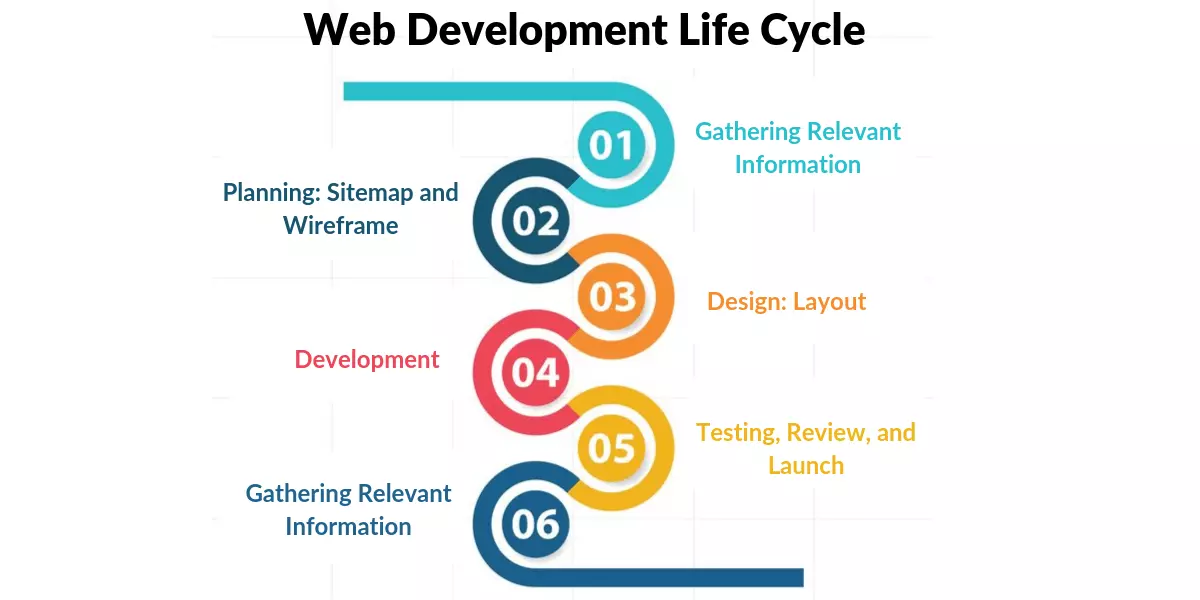
Wondering what a website development looks like? We have made a step-by-step process of how a website development process looks like.
1. Gathering Information

The first step is the crucial step. Why? Because it is the step of discovering and researching which decides how the subsequent steps look like. The most important task at this point is to understand what is the main future purpose of the website, the main goals and the target audience. Hence with research, you develop a website development questionnaire to develop the best strategy for further project management.
Different websites have different requirements and have different functionalities. Hence different technologies are used.
A well-described and detailed strategy based on this pre-development data can save you money by preventing you from wasting resources on unanticipated issues like design changes or adding functionality that wasn’t originally envisioned. So, this step will ensure that your website design or plan is on the right track.
Estimated Time: 1-2 weeks
2. Planning

At this stage, the developer generates data that will allow customers to judge how the site will look like.
From the information gathered in the first stage, a sitemap and a wireframe are to be created in this stage. A site map will decide the relationship between the main areas of your website. It will help you to understand the usability of your final website. In simple words, a site map creates a structure of a site and makes a website user-friendly.
Now coming to the wireframe, it is the visual representation of your site or interface. It decides the functions, location of elements and features of your website. These functions/elements include login, email subscription, admin, live chat, etc. Wireframe in simple words looks like a simple, artless and cheap production sketch
Estimated Time: 2-6 weeks
3. Design

This step decides the entire look of the website. It decides the success of your business online as it is created as per the target audience (where again research of the target audience comes in handy). This step contains all the visual contents like images, videos, gifs, etc. The layout of the design is the designer’s work. It includes a color palette, themes, text/image/video placeholder, logos, and many more. After the design layout is done it is often sent to the client for feedback. On the basis of the feedback, the design goes under change(s) until the client is satisfied with it.
Estimated Time: 4-12 weeks
4. Content Writing and Assembly

Content writing and compiling often overlap with other steps. But this step can’t be skipped. This step adds the text that will allow you to communicate with your audience. It will also add the call to action. Content writing includes writing catchy headlines, text editing, new text, compiling old text, etc. This takes lots of time and effort. Often client provides some content that can be migrated to the website. This content writing step should always be completed before the coding starts.
Estimated Time: 5-15 weeks
5. Coding

Now the real work of creating the website starts. Graphic elements created in the designing step should be kept while creating the website. Usually, the homepage is created first and on the basis of importance other pages are created following the sitemap made in step 2.
Also, at this stage frameworks and CMS should be used to ensure that the server is capable of handling the installation and setup efficiently. While using CMS, you can also use CMS plugins by installing them if necessary.
All the features and interactivity is added now. At this stage, you’ll need a thorough understanding of each website building tool you’ll utilize.SEO is also added and coding is an important part of SEO too.
Estimated Time: 6-15 weeks
6. Testing, Review, and Launch

Testing becomes the most important part of the process. It makes sure that all the links, forms, scripts, and other elements are working, and nothing is broken. It uses a tool to run some spell check to avoid typos.
Code validators are used to check the compatibility of the codes to the current website standards. Valid codes are a huge necessity for cross-browser compatibility.
After the checks and re-checks, it is time to upload to the server. A File Type Protocol software is used for this. Final testing should be done once you’ve deployed the files to ensure that they’ve all been installed correctly.
Estimated Time: 2-4 weeks
7. Maintenance

A website is a service, not a product. So needs to be updated according to the target audience’s needs. The functionality and other elements of the website should be made sure that it works fine and satisfy the needs of the target audience. A feedback system should be added to make sure a user-friendly and problem-free user experience.
In case of any errors and bugs, they should be fixed immediately. CMS and websites need to be regularly updated to make the website experience smooth.
Estimated Time: Ongoing
Final Checklist (Please make it into an infographic)
- Gathering Information: a) Set goals of the website b) Decide on the target audience.
- Planning- a) Create sitemap b) Create wireframe c) Select technology stack
- Design- a) Create website layouts b) Review the layouts c) Get client feedback on the layouts d) Make changes if required
- Content Writing and Assembly- a) Write new content b) Get the content that has to be migrated
- Coding- a) Build and deploy website b) Add features and interactivity c) CMS d) Add SEO
- Testing, Review & Launch: a) Test created website b) Upload website to the server c) Final testing and launch
- Maintenance: a) Add user report system b) Fix bugs c) Keep website and CMS up-to-date
Website development, therefore, doesn’t start with coding and ends after launch. It is an ongoing process. Flexibility in the website makes your life easy to make changes or update.
Looks like a tiring process? Stop worrying! NativeByte is here for you. Our team can develop and design the website for your business very easily. We have an efficient team to make it possible. Want to get in touch with us? Visit us on nativebyte.co or follow us on our social media handles.